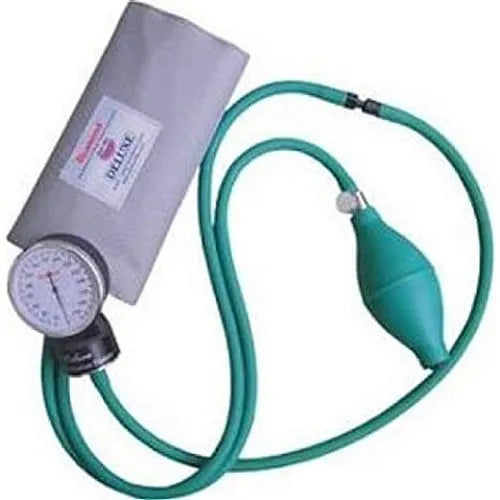
Type: Sphygmomanometer
Diamond Dial Deluxe Sphygmomanometer with Field Calibration BP Apparatus
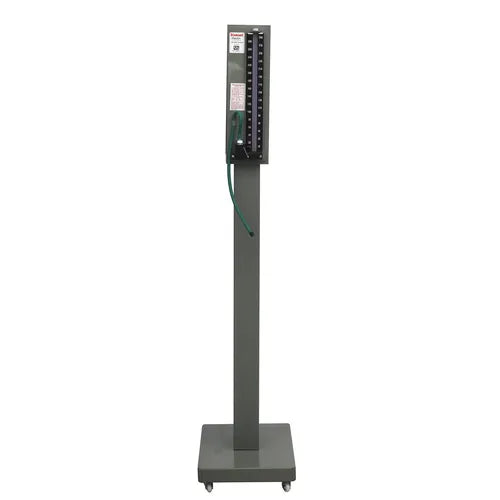
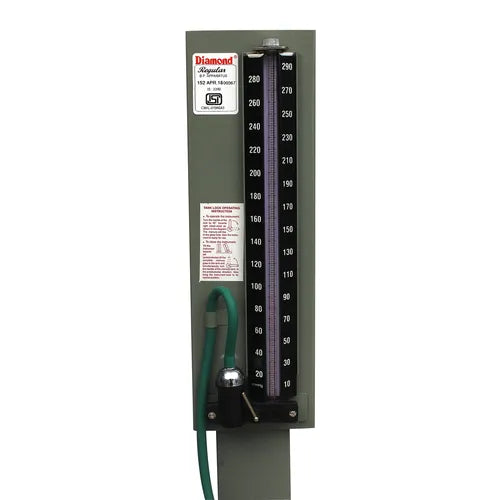
Type: Sphygmomanometer
Diamond Mercurial BP Instrument Stand Model with Velcro Cuff BPMR152
Collection:
Choosing the Right BP Apparatus for You
So, you've brought home a new blood pressure monitor. You've unboxed it, looked at the cuff and the screen, and are probably thinking, "Now what?" It can feel intimidating, but getting a reliable reading at home is an achievable skill. This guide is designed to walk you through every step, turning that initial confusion into lasting confidence.
Using a home BP monitor is about more than just tracking numbers; it's about gaining a clearer picture of your health between doctor's visits. In fact, major health organizations like the American Heart Association advocate for home monitoring because it provides a more realistic view of your blood pressure than a single, often stressful, reading in a clinic. It transforms a passive concern into an active partnership for your well-being.
Summary
This guide helps you choose and use a home blood pressure monitor for accurate, consistent results. For most people, an automatic digital upper-arm device with the correct cuff size is best; follow the 5-step pre-check, proper cuff placement, and keep the cuff at heart level. Measure consistently (often morning and evening), log context, and troubleshoot variability or error codes to build reliable trends. Know BP categories and emergency thresholds—recheck if you see 180/120 mmHg or higher, contact a clinician if it persists, and seek immediate help if paired with concerning symptoms.
What the Two Numbers on the Screen Actually Mean
After your BP measurement device beeps and the cuff deflates, you're left with two numbers on the screen. It can feel like looking at a secret code, but understanding what these blood pressure numbers mean is simpler than you think. They represent a two-part snapshot of the pressure in your arteries, measured in a standard unit called millimeters of mercury (mmHg). Think of them as telling the story of a single heartbeat.
The top number, and the higher of the two, is your systolic pressure. To understand it, imagine your heart is a pump squeezing water through a garden hose. The systolic number measures the force at the moment your heart contracts and pushes blood out into your body. It's the peak pressure during your heartbeat---your heart at its busiest.
Following that is the bottom number, or diastolic pressure. This measures the pressure in your arteries when your heart is at rest between beats, refilling with blood for the next pump. Using our garden hose analogy, this is the lower, background pressure that remains in the hose while the pump is briefly off. Together, these two numbers give a clear picture of how hard your heart is working and how much pressure your arteries are under all the time.
Why Your Doctor Wants You to Monitor Blood Pressure at Home
A single blood pressure reading at the doctor's office is like a single photograph of a day-long event---it only captures one brief moment. Your blood pressure naturally changes throughout the day, influenced by factors like stress, what you've eaten, and your activity level. A measurement taken in a clinical setting may not reflect your typical, everyday pressure.
For many people, the simple act of being in a medical setting can cause their blood pressure to temporarily spike. This common effect is known as "white coat hypertension," and it can lead to a reading that's higher than your true average. The opposite can also happen, where your pressure is normal at the clinic but higher during your regular day, a condition called "masked hypertension."
This is where a home BP monitor becomes an invaluable tool. By taking readings in your own environment over several days or weeks, you create a log of your blood pressure. This detailed record gives you and your doctor a much more accurate picture of your heart health, allowing for decisions based on trends, not just a single, potentially misleading measurement.
Automatic vs. Manual: Which BP Apparatus is Right for You?
Now that you know why a home monitor is so useful, the next question is: which one should you choose? When you start shopping, you'll quickly notice two main types of BP machines. Understanding the difference is key to getting a device that you'll feel confident using.
The most common choice is the automatic (digital) monitor . This is the all-in-one device you've likely seen at a pharmacy kiosk, with a cuff connected to a small machine with a digital screen. With the press of a button, it inflates, deflates, and displays your reading automatically. The other type is a manual (aneroid) monitor . This is the kit a nurse or doctor often uses, and it includes a cuff with a separate squeezy bulb, a round dial gauge, and requires a stethoscope to listen for the sound of your blood flow.
For the vast majority of people, the decision is straightforward. An automatic monitor is designed for simplicity and independent use, while a manual kit requires training and practice.
-
- Automatic (Digital) Monitor:Ease of Use: Very easy. Just wrap the cuff and press a button.
- Stethoscope Needed? No. The machine does the "listening" for you.
- Best For: Home users, beginners, and anyone looking for convenience.
- Manual (Aneroid) Monitor:Ease of Use: Difficult. Requires practice to inflate correctly and hear the specific sounds.
- Stethoscope Needed? Yes. This is essential for taking a reading.
- Best For: Trained healthcare professionals and medical students.
Because they remove the guesswork, automatic digital monitors are the standard recommendation for accurate at-home monitoring. Once you've settled on an automatic device, the next choice to consider is where on your arm it takes the reading, which can also impact your results.

Upper Arm vs. Wrist: Which Monitor Gives a More Reliable Reading?
You've decided on an automatic monitor, but now you see two options: one that wraps around your upper arm and another that fits like a watch. For getting the most dependable results, medical experts, including the American Heart Association, strongly recommend an upper arm cuff. The reason is simple: it measures pressure at the brachial artery, the major artery in your upper arm that is closer to your heart. This location provides a more direct and stable reflection of your core blood pressure.
The biggest challenge with wrist monitors is their sensitivity to body position. Because arteries in the wrist are narrower and not as deep, even a small change in your hand's position can throw off the reading. For a wrist monitor to be accurate, your arm and wrist must be positioned perfectly at heart level---a step that's easy to get wrong. An upper arm cuff, resting naturally beside your body, removes much of this guesswork, making an accurate reading easier to achieve.
However, a wrist monitor can be a good alternative in specific situations. If you have a very large arm that doesn't fit a standard cuff, or if you have a medical condition that makes taking a reading on your upper arm painful, a wrist device is a perfectly valid choice. The key is to be extra diligent about proper positioning. No matter which location you choose, getting the fit right is the next crucial step. In fact, an improperly sized cuff can be one of the biggest sources of error.
The Single Most Important Step: Why the Right Cuff Size is Non-Negotiable
After choosing your monitor, finding the right cuff fit is the next critical step. Think of it like a pair of shoes: one that's too tight will pinch, and one that's too loose won't give you any support. A blood pressure cuff works the same way, and getting the size wrong is a guaranteed path to an incorrect reading. Choosing the correct blood pressure cuff size is not a suggestion---it's a requirement for accuracy.
The impact of a poor fit is significant. A cuff that's too small for your arm can artificially inflate your systolic pressure (the top number) by as much as 10 to 20 points---enough to push a healthy reading into a concerning range. Conversely, an overly large cuff might not compress the artery properly, leading to a falsely low number that could mask a real issue. This makes cuff size a primary factor when troubleshooting inaccurate home blood pressure readings.
Thankfully, finding your perfect fit is simple. All you need is a soft, flexible measuring tape, like one used for sewing. As shown in the photo, wrap the tape around your bare upper arm at the midway point between your shoulder and your elbow. The tape should be snug but not digging into your skin. Note the measurement in either inches or centimeters---this is your arm circumference.
With your measurement in hand, inspect the cuff that came with your blood pressure kit. Nearly every cuff has a size range printed directly on the fabric, often with labels like "Adult" or "Large Adult" and specific numbers like "22-32 cm" or "9-13 in." Your arm measurement must fall within this range. If it doesn't, you'll need to purchase a separate cuff in the correct size to ensure your readings are trustworthy.

Your 5-Step Pre-Check for a Perfect Reading, Every Time
Now that your cuff fits perfectly, the next step is to prepare your body and your environment. Your blood pressure isn't a fixed number; it fluctuates constantly based on activity, stress, and even what you just drank. To get a reading that reflects your true resting health, you need to create a calm, consistent baseline. Think of it as letting the dust settle before taking a picture.
Completing this quick routine before every measurement is the best way to eliminate common factors that affect blood pressure readings. For at least five minutes before you press the start button, make sure you:
- Avoid Stimulants: Do not smoke, exercise, or drink caffeine for at least 30 minutes prior.
- Empty Your Bladder: A full bladder can temporarily and significantly raise your blood pressure.
- Sit and Rest: Find a comfortable chair with good back support. Sit quietly without talking or checking your phone.
- Get Grounded: Place both feet flat on the floor and keep your legs uncrossed.
- Position Your Arm: Rest your arm on a table or pillow so the cuff is level with your heart.
This simple ritual ensures that the number on your home blood pressure monitor reflects your body's true state, not just a reaction to your last cup of coffee.
How to Take Your Blood Pressure: A Simple Step-by-Step Walkthrough
Once you've completed your 5-minute pre-check and are feeling rested, it's time to position the cuff. Slide the cuff onto your bare upper arm, making sure the bottom edge sits about an inch, or two finger-widths, above the bend of your elbow. Most cuffs have an arrow or marker that should be aligned with the middle of your inner arm, where the main artery is located. This ensures the monitor is "listening" in the right spot.
Next, you need to check the tightness. The cuff should be snug, but not constricting. A good rule of thumb is that you should be able to slide two fingertips---but not your whole hand---under the top edge of the cuff. If it's too loose, the machine may give you an artificially low reading; if it's so tight it's pinching before it even inflates, your reading may come out falsely high. Getting this simple step right is crucial for accuracy.
With the cuff perfectly placed, you're ready for the main event. Simply press the "Start" button on your monitor and remain still and silent until the measurement is complete. You will feel the cuff inflate firmly, pause, and then slowly deflate. This is the machine at work, sensing the pressure in your arteries. Once it's done, two numbers will appear on the screen.
What Do My Numbers Mean? From Normal to High Blood Pressure
So, you have your reading: a top number (systolic) and a bottom number (diastolic). But what do the blood pressure numbers mean in the real world? It's not just about being "high" or "low." Health experts use five distinct categories to help you and your doctor understand your heart's health at a glance. Knowing where your numbers fall is the first step to taking control of your cardiovascular wellness.
Your reading is measured in "millimeters of mercury" (mmHg). According to guidelines from the American Heart Association, here is what is considered the BP normal range and what lies beyond it:
- Normal: Less than 120/80 mmHg
- Elevated: Systolic between 120--129 mmHg and diastolic less than 80 mmHg
- Hypertension Stage 1: Systolic between 130--139 mmHg or diastolic between 80--89 mmHg
- Hypertension Stage 2: Systolic 140 mmHg or higher or diastolic 90 mmHg or higher
- Hypertensive Crisis: A reading higher than 180/120 mmHg. This is a medical emergency. Seek immediate medical attention.
Remember, a single reading doesn't define your health; your doctor is looking for a consistent pattern over time. If your numbers regularly fall into the elevated or hypertension stages, it's time to share that information with your healthcare provider. They can determine what it means for you. Understanding these categories is crucial, but so is knowing when to measure to get the most consistent picture of your health.
What Time of Day Should I Check My Blood Pressure for the Best Results?
You might be wondering, what time of day should I check my pressure for the most accurate result? The answer isn't a specific hour, but a consistent routine. Your blood pressure isn't a single, fixed number; it has a natural daily rhythm. It's generally lowest while you sleep and gradually rises throughout the day, influenced by your activity, meals, and stress levels.
This daily pattern includes a sharp rise for most people right around the time they wake up, sometimes called the "morning surge." Because your BP naturally fluctuates, capturing just one moment in time can be misleading. That's why many doctors recommend taking two readings a day: once in the morning (before eating or taking medication) and once in the evening. This approach provides a much clearer picture of your average pressure and helps identify what time of day BP is highest for you.
More important than any specific time is the habit of consistency. Measuring at roughly the same times and under the same conditions each day allows your doctor to see a true pattern, separate from temporary spikes. This helps distinguish your body's natural rhythm from other factors that affect blood pressure readings. But what if you are consistent and your numbers still jump around? Let's explore some common culprits.
"My Readings are All Over the Place!" --- 3 Common Culprits for Inaccurate Results
Have you ever taken a few blood pressure readings in a row only to see the numbers jump around unpredictably? It's a frustrating experience that can make you doubt your health or your new machine. Before you worry, know that most of these swings aren't a sign of a problem, but a result of small, easy-to-fix habits. Mastering your routine is the secret to getting consistent, trustworthy results.
One of the biggest factors that affect blood pressure readings is your body's immediate state. Any activity---from climbing the stairs to simply talking or feeling stressed---will cause a temporary, real spike in your pressure. At the same time, your arm position matters more than you might think. Your cuff should always be at the same level as your heart, supported on a table or pillow. If your arm hangs down by your side, gravity can falsely increase the reading.
Another common source of error is taking measurements too quickly in succession. After the cuff squeezes your arm, the artery needs a moment to recover and for blood flow to return to normal. Measuring again immediately can give you a skewed result because the vessel hasn't had time to settle. The American Heart Association recommends waiting one to three minutes between readings to ensure accuracy.
By staying still, supporting your arm correctly, and allowing a brief pause between measurements, you will dramatically improve the reliability of your numbers. But what happens when the monitor doesn't show a reading at all, but a code like 'Err' or 'E1'? These common blood pressure monitor error messages have specific meanings we'll decode next.
Decoding Your Monitor's Error Codes (Err, E1, E5)
Seeing an error code flash on the screen instead of your blood pressure numbers can be confusing, but don't worry---it rarely means your machine is broken. In fact, these common blood pressure monitor error messages are a helpful sign that your device is working correctly by stopping a reading that would have been inaccurate. Think of them as simple instructions for troubleshooting your setup, ensuring the numbers you get are ones you can trust.
Most error codes point to a simple fix. While the exact codes can vary slightly between brands, they almost always relate to one of the key steps for a good measurement. Here are the most common ones you'll see:
- Err / E1 (Movement Detected): The machine picked up a body motion, a cough, or talking. Fix: Sit quietly without moving or speaking and try again after one minute.
- Err / E2 or E3 (Cuff/Air Issue): The cuff is likely too loose, or the air tube is kinked or not plugged in securely. Fix: Re-wrap the cuff snugly and check that the tube is straight and firmly connected.
- Err / E5 (Clothing Detected): The machine's sensor is being blocked by fabric. Fix: Always place the cuff directly on your bare arm, not over a sleeve.
- Lo (Low Batteries): The device doesn't have enough power for an accurate reading. Fix: Replace the batteries.
Once you can get consistent, error-free readings, you're ready to start tracking your numbers in a way your doctor will find useful.
How to Create a BP Log Your Doctor Will Find Useful
Getting accurate numbers from your home bp monitor is the first step, but the real power comes from how you track them over time. A simple list of numbers is good; however, a log that tells a story is far more valuable for you and your doctor. When your doctor sees a high reading, their first question will be, "What was going on at that time?" A good log provides the answer, helping them see patterns that a single office reading never could.
To create this story, add a brief note to each entry. It doesn't have to be complicated. Did you take it first thing in the morning? After taking your medication? Following a stressful work call or a large, salty meal? Jotting down this context---like "felt stressed" or "after coffee"---transforms your log from a simple data sheet into a powerful diagnostic tool. It helps your doctor distinguish between a random high reading and a consistent problem.
Many modern machines make this process nearly effortless. By syncing your blood pressure monitor to a phone app via Bluetooth, each reading is automatically saved with a time and date. Most apps also provide a simple section to add notes. This not only eliminates the need for a paper log but also makes it easy to chart your progress and share a clear, comprehensive report with your doctor.
While tracking trends is key for long-term health, it's also vital to know which numbers signal an immediate problem.
What is "Stroke Level" BP and When Should You Call for Help?
You may have heard the term "stroke level" blood pressure, which refers to a reading so high that it becomes a medical emergency. This is known as a hypertensive crisis , and the number to watch for is a reading of 180/120 mmHg or higher. While this is far above the normal BP range and requires immediate attention, your first step shouldn't be to panic. An unusually high number can sometimes be a one-time fluke caused by pain, extreme stress, or a machine error.
Because of this, the first thing to do if you see a reading of 180/120 mmHg or higher---but feel perfectly fine---is to wait five minutes. Sit quietly, breathe deeply, and then take your blood pressure again. If the second reading is still in that crisis range, it's time to call your doctor or seek urgent care for guidance. This is a serious situation that needs professional evaluation, even without other symptoms.
However, the protocol changes if that high reading is paired with specific warning signs. If you measure a blood pressure of 180/120 mmHg or higher and experience symptoms like chest pain, shortness of breath, sudden severe headache, numbness, vision changes, or difficulty speaking, you should not wait. This is a medical emergency that requires an immediate call to 911.
You've Mastered Your Monitor: What's Your Action Plan?
That home BP monitor sitting on your counter is no longer a mystery box. You've moved past the confusion of cuffs and buttons to understand what's happening when it squeezes your arm. You know the difference between your 'heart at work' and 'heart at rest' numbers, and more importantly, what it takes to get a reading you can truly trust.
You now know how to prepare your body, ensure your cuff fits, and sit for success. The most powerful step you can take next is to build a simple, consistent routine. Using this blood pressure guide, that logbook of readings becomes more than just data; it's the unique story of your health---a story you are now equipped to record with confidence.
See your bp apparatus not as a test, but as a communication tool. Each accurate reading transforms you from a passive patient into an active, informed partner in your own healthcare. You're no longer just receiving information---you are gathering it, understanding it, and bringing it to the table for more meaningful conversations with your doctor. That is a powerful place to be.
Q&A
Question: Why do clinic readings sometimes differ from my home readings?
Short answer: A single office reading is just a snapshot and can be skewed by stress, recent activity, or what you’ve eaten. Many people experience “white coat hypertension” (higher in the clinic than usual) or its opposite, “masked hypertension” (normal in the clinic, higher in daily life). Regular home measurements over days or weeks create a trend that better reflects your true, everyday blood pressure.
Question: What exactly do the top and bottom numbers mean on my monitor?
Short answer: The top number is systolic pressure—the peak force in your arteries when your heart contracts and pumps blood out. The bottom number is diastolic pressure—the pressure when your heart relaxes between beats. Together they show how hard your heart is working and the constant pressure your arteries experience, measured in mmHg.
Question: How should I place and tighten the cuff to get an accurate reading?
Short answer: Put the cuff on bare skin with the bottom edge about 1 inch (two finger-widths) above your elbow. Align the cuff’s arrow/marker with the middle of your inner upper arm (over the main artery). Tighten so it’s snug—you should be able to slide two fingertips under the top edge, but not your whole hand. Rest your arm so the cuff is level with your heart, stay still and silent, and let the monitor run.
Question: My readings jump around—what causes that, and how can I stabilize them?
Short answer: Normal fluctuations come from recent activity, stress, talking, or poor positioning. For steadier results, follow the 5-step pre-check: avoid caffeine, smoking, and exercise for 30 minutes; empty your bladder; sit quietly with back supported; keep feet flat and legs uncrossed; and support your arm so the cuff is at heart level. If you repeat a reading, wait 1–3 minutes to let your artery recover. Keeping conditions consistent (often morning and evening) helps build reliable trends.
Question: What do common error codes (Err, E1, E5, Lo) mean, and what should I do?
Short answer: These usually flag fixable setup issues, not a broken device. Err/E1 often means movement (talking, coughing)—sit still and retry after a minute. E2/E3 point to cuff/air problems—re-wrap the cuff snugly and ensure the tube is straight and firmly connected. E5 indicates clothing—place the cuff on bare skin. “Lo” means low batteries—replace them and try again.