

Type: General
3M ECG Adhesive Electrode (Pack of 100)
Regular price
Rs. 828
Sale price
Rs. 828
Regular price
Rs. 2,328


Type: Operating Room
ECG Electrocardiogram Trolley Mild Steel for Hospital
Regular price
Rs. 8,850
Sale price
Rs. 8,850
Regular price
Rs. 15,000


Type: ecg machine
3 Channel ECG Machine 7 Inch Touch Screen and 5 ECG Paper Rolls with 1 Year Warranty
Regular price
Rs. 19,779
Sale price
Rs. 19,779
Regular price
Rs. 32,200


Type: ECG Clamp
ECG Clamp Electrodes (Pack of 4)
Regular price
Rs. 919
Sale price
Rs. 919
Regular price
Rs. 1,380
Type: para
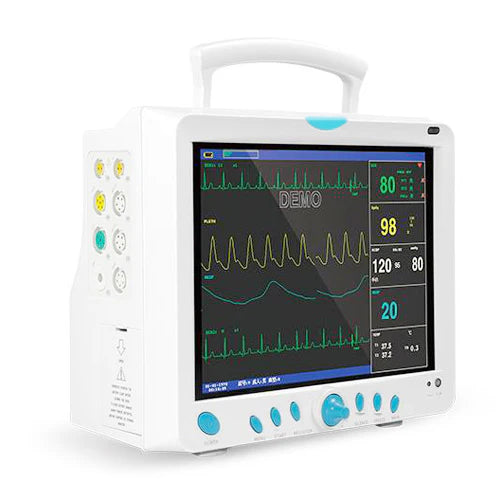
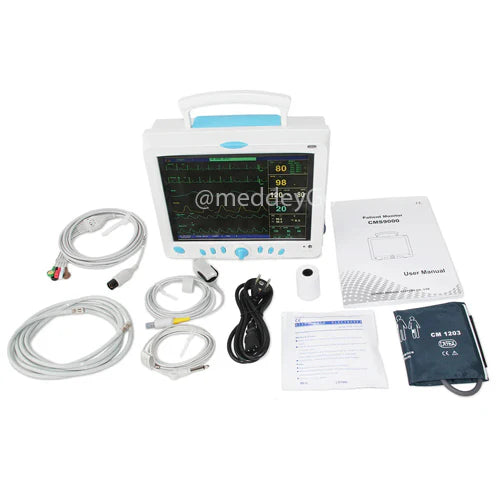
CONTEC CMS 9000 5 Para Monitor ECG, NIBP, Sp02, Pulse Rate, NIBP and TEMP
Regular price
From Rs. 39,999
Sale price
From Rs. 39,999
Regular price
Rs. 41,400

Type: ecg machine
12 Channel ECG Machine with High Quality Waveforms
Regular price
Rs. 56,499
Sale price
Rs. 56,499
Regular price
Rs. 69,000


Type: ecg
Single Channel ECG Machine
Regular price
Rs. 18,879
Sale price
Rs. 18,879
Regular price
Rs. 27,600


Type: ecg machine
3 Channel ECG Machine 7 Inch Touch 12 Lead Support
Regular price
Rs. 19,779
Sale price
Rs. 19,779
Regular price
Rs. 32,200


Type: Device
Electrocardiogram Machine 12 Lead ECG 7 Inch Screen
Regular price
Rs. 48,499
Sale price
Rs. 48,499
Regular price
Rs. 60,200


Type: ECG Machine
12 Channel ECG Machine with Auto Analysis and Diagnosis Function
Regular price
Rs. 56,400
Sale price
Rs. 56,400
Regular price
Rs. 69,000


Type: ecg machine
3 Channel ECG Machine with High Quality Waveforms
Regular price
Rs. 24,932
Sale price
Rs. 24,932
Regular price
Rs. 32,200


Type: ECG Machine
CMS6000 5 Para ICU CCU Vital Signs ECG,NIBP,SPO2,PR,TEMP 8Inch TFT color LCD
Regular price
From Rs. 29,800
Sale price
From Rs. 29,800
Regular price
Rs. 35,000


Type:
BPL Cardiart 9108 – 12 Channel ECG Machine
Regular price
Rs. 114,800
Sale price
Rs. 114,800
Regular price
Rs. 180,000


Type:
BPL 12 Channel ECG Machine | Cardiart 9108D
Regular price
Rs. 97,400
Sale price
Rs. 97,400
Regular price
Rs. 148,000


Type: ecg
6 Channel ECG Machine with High Quality Waveforms
Regular price
Rs. 34,499
Sale price
Rs. 34,499
Regular price
Rs. 41,400